It's my first time hosting Flannel Friday and I am very, very excited!
Thursday, April 4, 2013
Flannel Friday Place Holder
25 Days of Art: Paper Mache Pinatas
The last time I made a pinata for a program all of the kids wanted to help me. So pinata making seemed like a perfect fit for a 25 Days of Art project. Like I said in my introduction, Wednesday projects are a little bit more tricky and take a little bit more supervision and instruction. This one really could be done as a drop in, but it's so messy that I wanted a little more control over what was happening when.
Supplies:
-watered down glue
-tissue paper
-balloons (5'' is best but others will work just fine)
- paint brushes
-pipe cleaner/yarn (for drying)
Prep:
Rip up the tissue paper into tiny bits and help any kids that need help in blowing up their balloons.
Process: You can find picture filled pinata instructions here. But for those of you that can follow just words...
Using the paint brushes and the watery glue, glue the tissue paper bits to the blown up balloon. The tissue paper bits should cover the balloon completely, leaving a small space around the tail-or the knot where you tied the balloon closed. Then go back and add a second layer. And a third. Play around with different colors of tissue paper, You can create some really cool mosaic looks with the ripped up paper.
Once you've got the balloon completely covered to your satisfaction, string a piece of yarn or a pipe cleaner through the balloon tail and hang it up to dry.
Follow Up:
When the balloons are completely dry, pop the balloon and pull it out through the small hole. Use scissors to make the hole big enough to fill (if you're making a pinata) or cut to size (if you're making a bowl). If you're making a pinata, fill it with whatever you want. Then lay a long piece of string across the opening and cover the opening it with a few layers of watery glue and tissue paper. When it's completely dry you can hang the mini-pinata by the string or use it to rip the pinata open.
Miss Lucy's Example:
I made a bowl. Experiment with things other than bowls and pinatas, though. I bet a small LED light inside would make a beautiful lantern.
Kid Art:
Wednesday, April 3, 2013
25 Days of Art: Thumbprint Art
I've gone on at length about my love of Ed Emberley's drawing books before. They are the greatest. But whenever I mention them in story time, or read Go Away Big Green Monster, the parents all remember him from his tumbprint art books; books that I had never really sat down and used before now.Part of the goal for 25 Days of Art is to highlight different parts of the collection- art and craft books that can be checked out, biographies of artists, even fiction that relates to the theme of the day. So for today's project, I brought down the tumbprint books from the 730s, laid out some ink pads and markers and let the kids go crazy. it's incredible how different and unique pictures can be when they spring from the same basic smudge.
Supplies:
-Ed Emberley's Great Thumbprint Drawing Book (optional)
-ink pads
or
-washable markers
-paper
-markers (sharpies or fine tip work best, but fat washable ones will do in a pinch)
Prep:
NONE
Process:
Using the ink pad or the washable marker, get ink all over your thumb (or other finger) and press it down on the piece of paper. You can usually get about 3 good prints from each ink application. After you've got enough prints to start, pick up a marker and start turning those thumbprints into something beautiful. The Emberley book has some great suggestions and you can always come up with your own. Make a mish-mash scene like I did above, or a coherent scene like below.
Miss Lucy's Example:
by Ed Emberley
Supplies:
-Ed Emberley's Great Thumbprint Drawing Book (optional)
-ink pads
or
-washable markers
-paper
-markers (sharpies or fine tip work best, but fat washable ones will do in a pinch)
Prep:
NONE
Process:
Using the ink pad or the washable marker, get ink all over your thumb (or other finger) and press it down on the piece of paper. You can usually get about 3 good prints from each ink application. After you've got enough prints to start, pick up a marker and start turning those thumbprints into something beautiful. The Emberley book has some great suggestions and you can always come up with your own. Make a mish-mash scene like I did above, or a coherent scene like below.
Miss Lucy's Example:
Kid Art:
Bibliography:
-Ed Emberley's Great Thumbprint Drawing BookTuesday, April 2, 2013
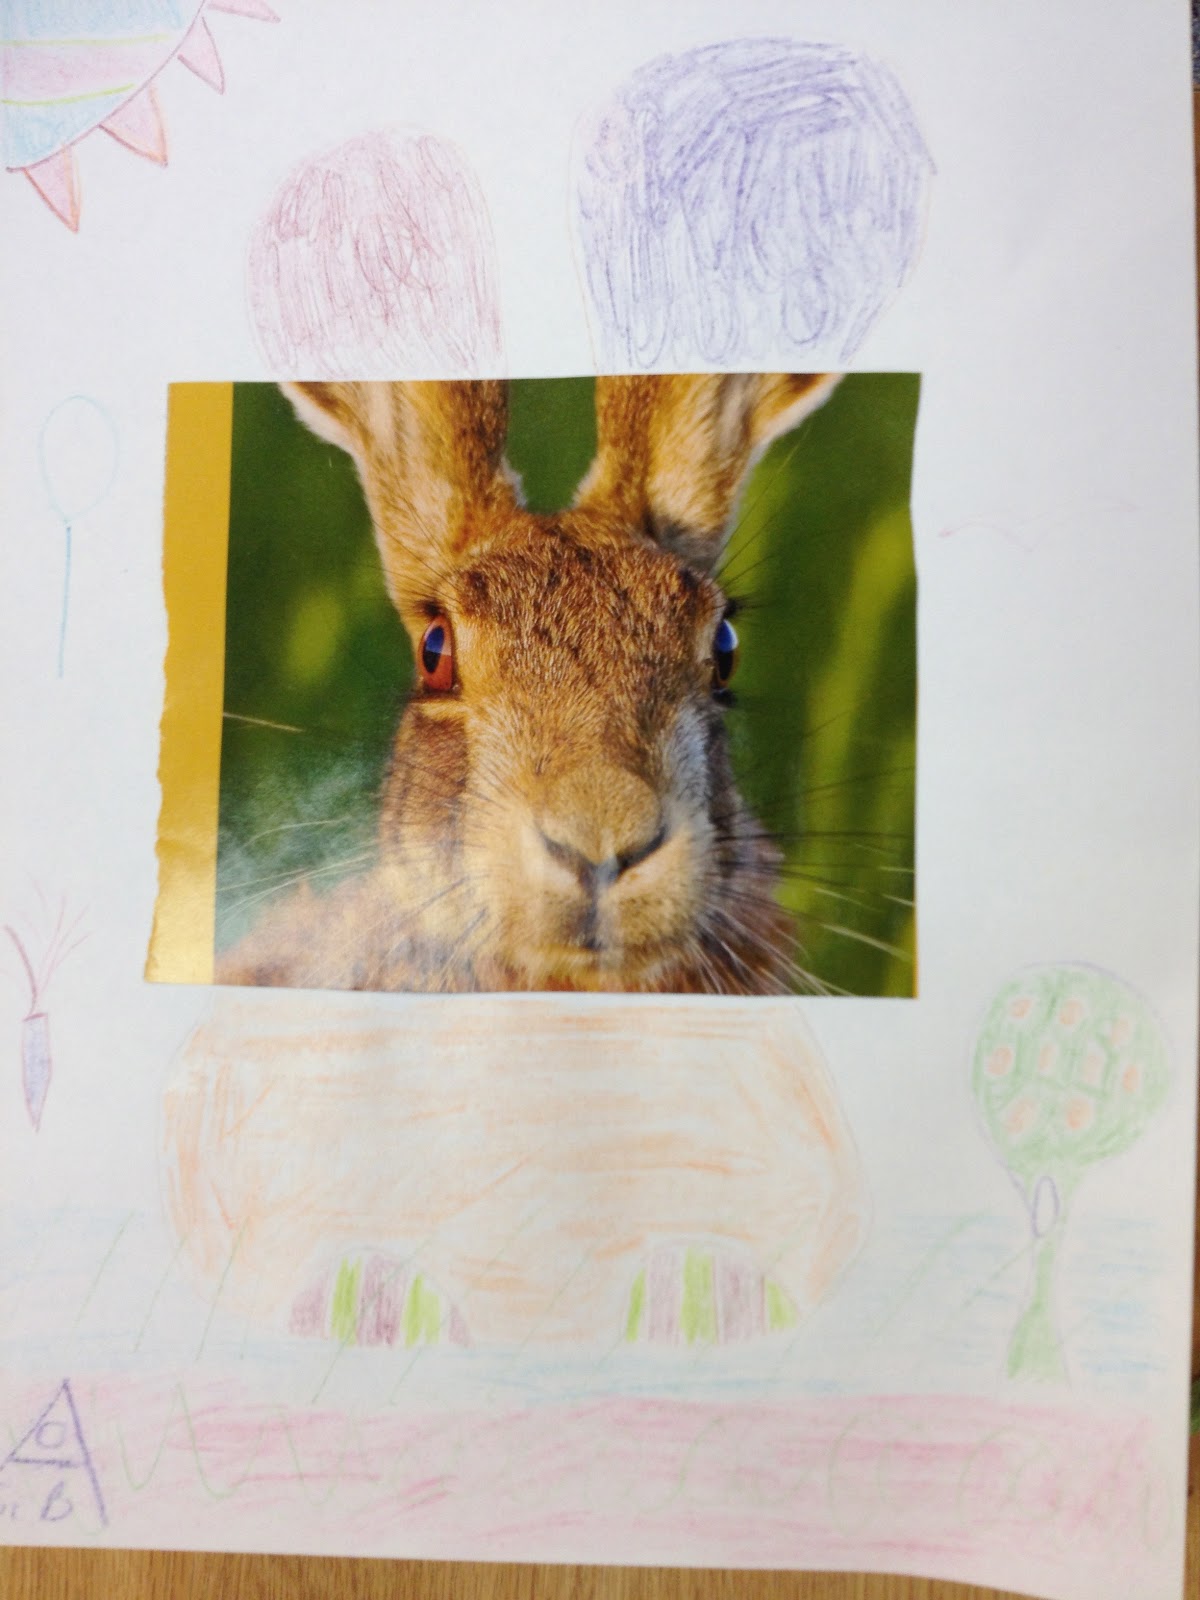
25 Days of Art: Complete the Picture
Staring at a blank page can be intimidating for any artist, be they 5 or 55. There are so many possibilities and (for me, at least) so many ways to go wrong. That's why I like this "Complete the Picture" exercise so much. There's plenty of room for creativity- why is that woman so excited? What is that rabbit running from?- but there's also some structure. There's a scale already in place and there are always easy things to complete- the woman's body, the sky above the rabbit- until that stroke of genius hits and you can fill in the rest of the page.


Supplies:
-magazines (prep)
-scissors (prep)
-glue sticks (prep)
-paper (prep)
-coloring supplies like colored pencils or markers
Prep:
Go through a magazine and cut out interesting photos. Crop them to no more than 5x6 squares. Try to crop them in interesting ways and so there's always something that can be directly continued from the picture. For example- the excited woman? awesome, draw her lower body. The rabbit running? I screwed up on that one.
Once you have your pictures, glue them onto larger sheets on paper. Experiment with the placement. They don't always have to be in the exact middle of the paper. Changing the placement may change the entire end result.
If you have older kids, they can also do this part to find the exact picture that they want to continue. make sure you let them know that they can complete it in an entirely different way than it looks in its original setting.
Process:
Once a picture has been chosen, let the kids complete them however they want. my question is "What's happening in the white space?" If they're having a hard time coming up with something ask leading questions. What's happening in the actual picture that they do have? What is found near it/around it in the real world? In a dream world? What would be funny? What would be scary?
Miss Lucy's Example:
Kid (and Caretaker) Art:
Monday, April 1, 2013
25 Days of Art: An Introduction
Hey ya'll! Welcome to April. I know, I know, I don't usually post on Mondays but this month we're doing things a little bit differently.
April is a stressful month in our little corner of the world. The first week is spring break for public schools and the state mandated standardized tests take up the rest of the month. Standardized tests that will require a lot of kids who do not like to sit still to sit still for a very long time. In other words, it's about to get cray-cray in here.
We were going to do a huge Poetry Month project wherein there would be a different poetry prompt every day of the month. I was going to involve teachers at the local elementary school to make poetry a center in their classrooms, and at the end of the month we would have gathered all the poems into an anthology that would become a temporary part of our circulating collection using one of the burner bar codes that we have on hand for magazine check-outs. Maybe it's just because I'm a huge geek, but the idea of other people being able to check out a book that I'd contributed to would have made a 10 year old Lucy die of happiness.
I still love the idea of a huge poetry initiative but sadly April, National Poetry Month, is simply not the time for us. Instead, this idea has morphed into the 25 Days of Art challenge.
There will be one new art project every single day that the library is open in April. That boils down to 25 days and 25 art projects once you take into account Sundays and Emancipation Day (we have the best holidays off). Some of the projects will focus on the style or art of individual artists, some will just be a fun activity. Most of the projects will be drop-in, no instruction or supervision needed but once a week I'll be leading a more structured project with demonstrations and my full, undivided attention for helping out.
So what does that mean for the blog? Well, the blog is going to look a little different in April. I'll still do Flannel Friday, because I love it and have been missing it the last few weeks. But everything else will change. Instead of Tuesday and Thursday posts there will be a post every day, except Sundays, about the art project that we did the previous day. There will be supply lists, instructions, what worked and didn't,some pictures and, if applicable, book lists. All of my sources and inspirations will be documented to the best of my abilities.
I'm traveling some in April for weddings, so the blog posts that go up might not be 100% complete, but they will be updated as soon as possible to include examples of kid made art and how smoothly or not so smoothly the project ran.
I'm really excited (and a little lot nervous) about April, but hopefully we'll all come through with our sanity in check.
Friday, March 29, 2013
Flannel Friday: Whose Hat is That?
I made this in about 15 minutes before story time on Thursday, I've had a bad procrastinating streak lately. When I get a chance I'll go back and make both a boy and a girl face so that there's a little more diversity in the dressing up- I realized after I had made it that there were 4 pretty stereotypical boy professions and 1 stereotypical girl profession (if you consider a witch a profession) and I'd like to switch it up a bit in the presentation.
Anyway we start with my friend Pete (aka Pete the Pirate from This Little Pirate) and I told the kids that Pete likes to dress up and pretend to be different people. He uses hats in his dress-up and we have to guess what Pete is going to be...
I run into fires to save the day, my bright red hat keeps me safe all the way!
Pete's a firefighter!
I ride a broom with a cat on the back, my hat is a triangle, pointy and black.
Pete's a witch!
I cook all day, I cook all night, my hat is big, puffy and white.
Pete's a chef!
And sometimes we know what Pete wants to dress up as, but we have to help him find the right hat.
I'm a king, I rule this town. I wear a special hat, it's called a....
CROWN!
Whether I'm catching a ball, or swinging a bat, on my head I've got a....
BASEBALL CAP!
And that's our hat game.
Thursday, March 28, 2013
Theme Thursday: Hats Galore!
I've had a really bad case of "but I don't wanna"s for the last month. This happens to me a lot when I'm working on a big project that I'm excited about, but still have to find the time for the daily things that I need to do. Like plan story time. Which is why it was 9:45 this morning before I decided on a theme for my 10:30 story time and started grabbing books and frantically making a flannel set. We went with "hats." Alas, my beloved Millie's Marvelous Hats is too long for my preschool crowd, but I was able to find some good substitutes.
Song: Good Morning Dear Earth
Finger Play: I Had a Little Turtle
Song: Open, Shut Them
Book: The Magic Hat
by Mem Fox

Flannel: 5 Little Ducks
Song: Grand Old Duke of York
Song: Shake My Sillies Out from The Singable Songs Collection (20th Anniversary Special Edition)
Book: I Want My Hat Back
by Jon Klassen


Song: If You're Happy and You Know It
Flannel: Who's Hat is That?
Song: Turn Around from Getting to know Myself
Make and Take Crafts: Visor Hats
We had a bunch of foam visors in a file cabinet I labeled "Foam Junk," if you don't have an excess supply of foam junk, check out the pirate hats we made a few months ago.

Supplies:
-foam visors
-glitter glue
-pipe cleaners
Process: After story time we all gathered around the craft table and I handed out visors, glitter glue and pipe cleaners. The pipe cleaners are very easy to stick through the foam visors, so you could make extra hair or springy coils coming out of the top. Most kids just used the visors and a canvas for experimenting with glitter glue.

Time: Prep took 2 minutes (most of which was spent finding the visors) and the craft took about 20.
Song: Good Morning Dear Earth
Finger Play: I Had a Little Turtle
Song: Open, Shut Them
Book: The Magic Hat
Flannel: 5 Little Ducks
Song: Grand Old Duke of York
Song: Shake My Sillies Out from The Singable Songs Collection (20th Anniversary Special Edition)
Book: I Want My Hat Back
Song: If You're Happy and You Know It
Flannel: Who's Hat is That?
Song: Turn Around from Getting to know Myself
Make and Take Crafts: Visor Hats
We had a bunch of foam visors in a file cabinet I labeled "Foam Junk," if you don't have an excess supply of foam junk, check out the pirate hats we made a few months ago.
Supplies:
-foam visors
-glitter glue
-pipe cleaners
Process: After story time we all gathered around the craft table and I handed out visors, glitter glue and pipe cleaners. The pipe cleaners are very easy to stick through the foam visors, so you could make extra hair or springy coils coming out of the top. Most kids just used the visors and a canvas for experimenting with glitter glue.
Time: Prep took 2 minutes (most of which was spent finding the visors) and the craft took about 20.
Subscribe to:
Posts (Atom)