Wednesday marks my first full year as a real live, actual factual children's librarian. Now, I like to think that I got some pretty good schooling when I did my MLS. I also tried to make conscientious decisions about working in children's services and the information field when I did internships and looked for jobs to support myself through that degree, I thought I had a pretty good idea of what I was in for. Hoooo boy, was I wrong. I love, and at times hate, this job way more than I ever thought possible and believe me, there has been an incredibly steep learning curve.
Below are a couple of the most important lessons that I've taken away from this first year. Lessons that were definitely not included in my coursework, but which I wish had been mentioned somewhere.
1) Sometimes I wake up in the morning and think "I want to wear every single piece of tye-dyed clothing that I own today." And that's totally acceptable. In fact, it might even make me a bit better at my job. Kids are way more likely to come talk to me when I'm dressed in what is basically a costume than they are on my (few and far between) ironed blouse days. I have also applied this logic to an Elvis print sundress, neon tights and even the swimsuit coverup that I am currently wearing as a dress.
2) If you're going to wear a skirt, wear shorts underneath it. At some point a child is going to stick his/her head up underneath your skirt (or just try to lift it up for all the world to see) and it is up to you what they'll be getting an eyeful of. Same logic applies to necklaces and dangley earrings. They will get tugged on and your neck/ears, not to mention the integrity of your jewelry, depends on what you decided to put on that morning.
3) Working weird hours is kinda awesome. Working in a public library means that a lot of the time you're at work when everyone else is off, so the public can actually visit the library. Makes sense. This early and late schedule with some weekend days takes some getting used to, but once you've been doing it for a few weeks, it's the best kind of schedule that there is. I mean, maybe if you have a family and like to eat dinner with them or something these hours aren't so hot, but for me? Couldn't be better. Working days when most people have off means I have days off when most people have to work. I love shopping for groceries or going to the post office or trying to get a new driver's license in the middle of the day on Friday. There are never any lines/ Plus, if you don't want to do something it is super easy to get out of it by saying "Oh, sorry, I'd love to, but that's one of my late nights." Trust me, no one ever bothers to remember what your ACTUAL late nights are and they make a great excuse.
4) If you want to learn a new skill, or just have a little extra time for your favorite one, build a library program around it. We had a super successful Mother's Day program because I thought that origami flowers look cool and wanted to know how to do it myself. And the knitting circle that I started is the only program at the library that attracts children, teens AND adults.
5) The internet is so freaking cool. Seriously, I have no idea how children's librarians found new ideas before the internet was around. From pinterest to blogs to reading challenges, there is such a wealth of knowledge and expertise out there. Discovering Flannel Friday not only gave me an outlet to share things that I am proud of, it opened up an entirely new world of story time and book ideas. We talk a lot about the negative effects that technology has had on traditional library services, but I think it's time that the good parts- like resource sharing- got a voice in the conversation too.
6) Embrace your community. This applies to many things, like the internet community I've mentioned above. Always give credit where credit is due and don't be shy with praise or suggestions. But it also applies to the physical community your library is in. I was recently banned from the community listserv because when I send out blasts about library programs and events it's considered advertising, which is a big no-no. But now I've got two super secret spy parents (one for toddler and pre-school programs and one for elementary programs) who do my dirty work for me. I just type up a blurb that I want out there and e-mail it to them for them to send on. I've had parents take me as their guest to Music and Movement Classes so I can see what I need to do if I decide to develop one at the library, and it's always fun (and a little scary) when kids come up and hug you in the street and their parents have NO IDEA what's going on.
7) Also embrace any down time that you have. I remember my first few days at this job having absolutely nothing to do. I was still in training, so other librarians were doing story time and I had no clue about elementary age programming yet. I was bored out of my mind. I actually voluntarily shelved books, and I hate shelving books. I remember thinking "Ah shoot, this is definitely just a job and not a vocation. How did I screw that up so badly? Okay, calm down, maybe I just won't be the type of person that finds fulfillment in my work." I was so so wrong. And while I'm happy that the days of thinking I'd chosen the wrong career are long over, sometimes I wish I could recapture some of that downtime from those first few days and spread it out. Because now it is go, go, go and I seriously need those few moments where I can catch my breath and meditate for a few seconds before moving on to the next thing.
8) Haters gonna hate. You can't please everyone. Some people are going to stop coming to story time because they don't like how you do it. Some kid is going to get mad and tell you that you're the mean one and they hate you. Parents will get up in your face about perceived mistreatment of their precious little darlings and no matter how many times you say it, people will always sneak food into the library. But as long as you are confident in your actions and consistent in how you apply the rules, people will come back. And if they don't, new ones will.
9) The good things about this job don't make up for the bad. It's not a scale to be balanced. No baby saying your name for the first time is going to make it okay when someone calls you a "white ass bitch" and knocks down displays on their way out of the library. No kid loving the book you recommended will make it worth it for a parent to call you a racist. So you learn to push through the bad times and keep the good moments it your pocket, so you can revisit them when need be.
10) You can make new worlds out of cardboard, tape, a glue stick and butcher paper. It really is all you need.
Tuesday, July 31, 2012
Friday, July 27, 2012
Flannel Friday: Yee-Haw
I think this poem is called "Dress the Cowboy" but because I used so many ridiculous colors to make his clothes, I've been calling it "The Colorful Cowboy" in my head. I made a few minor adjustments to the rhyme, eliminated the red underwear and added in the color before whatever the object is, but basically it remains the same as the original.
I'm in the record as thinking felt people are creepy, but there wasn't an easy way to get out of this one, so I went as creepy as possible. The head is purple felt with bright green embroidery. It took about half an hour in front of the tv one night, but clip art would work just as well if you're so inclined.
"So this is our cowboy you guys. Is he ready to head out and spend a day on the range? No! He doesn't have a body! You're right. Well, we better help him get dressed. Can you guys do that? Yes! Let's go."

"Out in the dessert you don't want to get hurt,
so this cowboy wears a yellow wool SHIRT"

"Deserts and praries are a cowboy's scene
So on his legs he wears sturdy blue JEANS"

"The cowboy ran, bent and knelt,
So to keep his pants up he wears a strong red BELT"

"The coyote howls and the old owl hoots,
On his feet this cowboy wears bright green BOOTS"

"Are we done? We're missing one thing. What's the last thing a cowboy needs before he goes out for the day?
Yup, a cowboy is a cowboy and that is that
On his head he wears a yellow 10 gallon HAT"

"Great job you guys, this cowboy is ready to go out for the day. Give yourselves a round of applause"
AND
Using flannel pieces I already had (plus one white square) I was able to add some interest to this finger play.
I gave my horse an apple
And she gave me a neigh

I gave my horse a carrot
And she turned her head this way

I gave my horse a lump of sugar
She gave me a smile
And took me on a ride that lasted half a mile!

Amanda at Toddler Tales is hosting this week's round-up. If you want to learn more about Flannel Friday, visit the awesome blossom website.
Thursday, July 26, 2012
Theme Thursday: Baby, It's Cold Outside
It is not cold outside. It is hot, hot, hot and thanks to the age of this building and its air conditioning unit failure, it is also hot, hot, hot inside. We had to close down the children's room and move story time to the basement because the temperature upstairs was 90 degrees. In an effort to combat the heat, we had story time on things that are cold. I was a little shivery by the end, but that could have just been the ice cubes we painted with during the craft.
Song: Good Morning Dear Earth
Flannel: Alphabet Soup- HOT and COLD
Flannel: 5 Little Snowmen
Book: Mouse's First Snow by Lauren Thompson

Song: Itsy Bitsy Spider
Song: Shake Your Sillies Out
Song: Head, Shoulders, Knees and Toes
Book: A Penguin Story by Antoinette Portis

Flannel: Up North There's a Very Cold Ocean

I borrowed this flannel (and the idea for this week's theme) from Miss Mary Liberry. Also my penguin lost his beak sometime after story time.
Finger Play: 2 Little Blackbirds
Song: Turn Around from Getting to Know Myself
Make and Take Craft: Painting with Ice Cubes

Supplies:
-ice cube trays
-water
-food coloring
-paper
Process:
I got my idea from Pinterest and this website (who in turn links back to her Pinterest inspiration). I also used food coloring because I wanted it to be okay if one of the kids popped an ice cube in their mouth by mistake. Food color comes out of just about anything, including hands and clothes, if you just soak it in vinegar first. Instead of filling up the ice trays and adding food coloring then, I mixed up a half glass of water and added to color there before pouring into a few cells. This made the color more diluted than other examples you'll see, but it came out a nice pastel shade and was throughly enjoyed by kids and caregivers alike.
After story time, I laid out blank paper and coloring sheets of polar bears and penguins. I ran up stairs to grab my bowls of ice cubes, still in the freezer and brought them down. The kids took it from there.
Time: Prep took about 5 minutes, but make sure you do it long enough ahead of time that the ice cubes freeze! Craft took 40, the kids really loved these ice cubes!
I had some really cute examples of pastel tie-dyed penguins and polar bears, but they disappeared before I could take pictures!
Tuesday, July 24, 2012
Diary of a Wimpy Kid Party
The third movie from this insanely popular book series comes out on August 3rd. And what better way to celebrate something that actually gets my reluctant readers to read than with a party. We haven't actually had to party yet, that'll be on the Wednesday before the movie comes out. But I wanted to get this post out so in case anyone is looking for ideas for their own Wimpy Kid party, they can see what I'm planning on doing and I also want to crowd source for more ideas. What is everyone else doing? How are you going to make this Wimpy Kids party the best ever?
Here's our basic rundown:
1. Cheese Touch
This is the incredibly gross slice of cheese I made by smearing gray and green washable marker all over a square of yellow origami paper. Then I glued the piece of paper to a piece of sticky, label paper and cut out some strategic holes.
 Our cheese touch game will begin at the start of the party and be ongoing throughout. After explaining the rules, I'll discretely stick the gross piece of cheese on someone's back once we start Wimpy Kid trivia. The goal will then be to recognize that you have the cheese touch and to give it to someone else (by putting the sticker on their back). If you get caught, you have to keep it. The person with the cheese touch at the end of the party loses and will have some menial task, like helping me clean up.
2. Wimpy Kid Trivia
All trivia questions will be taken from the event kit for the Dog Days book launch. Shamefully, I have only read the first in the series. Bad librarian.
I wanted to do trivia right away, to help jog memories for later games, namely...
3. Exquisite Corpse
Okay, so I'll think of a new name before the party, but this was one of my very favorite games growing up. I could seriously play it for hours, and sometimes did.
 It works like this: everyone will get a piece of paper with something from Diary of a Wimpy Kid written at the very top.
They'll then have to draw the phrase they see.
After drawing the phrase, they'll fold over the top so no one can see the words and pass it to the next person. That person has to write down what they think the person before them was drawing.
It goes around like this until the paper is back at its original draw-er and then you unfold the papers to see what everyone came up with. It's like a drawing version of telephone!

4. Wimpy Kid Cookies
I'm going to get some sugar cookies and pre-ice a white base. Then, with black icing piping bags (which will actually be ziplock bags with a snip cut out at a corner) the kids can decorate the cookies with the faces of their favorite Wimpy Kid characters. There'll be step by step directions for drawing each of the main characters and some paper and markers in case anyone gets tired of cookies or has to wait for a piping bag.
Here are my instructions for Greg and Rowley:


And 5. Watch the movie
Depending on which movie I can get my hands on, we'll be finishing the party by watching one of the previous two Wimpy Kid movies. There'll be pizza for the ones who participated in the first part of the party and popcorn for everyone.
And that's the plan! What do you guys think? Games to add, suggestion to make these run smoothly, anything at all? This is the first large scale party I've attempted since the Halloween debacle of '11 so I'm a little nervous. But hey, everyone loves pizza, right?
UPDATE: Man did those cookies turn out cute.


My crowd was also a little young for the Exquisite Corpse game, so I quickly whipped up some DIY Zowee Momma comic strips. I drew a basic 3 cell comic strip, the first two were blank and the last one was Rowley saying "Zowee Momma!"


Friday, July 20, 2012
Flannel Friday: Build a Robot
This flannel friday game(?) is a mish-mash of a few different posts. Take a little bit of K's Rainbow Stew and a bit of Library Quine's Get in Shape Robots, mix it in with my professed love of drawing complex pictures by breaking them down into individual shapes and you've got Build a Robot.
We start by looking at lots and lots of shapes, talking about color, size and of course, shape.

After we get them all up on the board, we put them in our pot and stir it, stir it, stir it a lot.

(I don't actually have a pot. Just a cardboard box that I covered in butcher paper. But my kids have great imaginations.)
We reach in and pull out... A ROBOT!

Then we talk about where all the shapes went.
I have two robot "sets" right now, but one is usually all anyone has the attention span to finish.

The Flannel Friday Round-Up is being hosted by Kay at Storytime ABC this week. For even more flannel-y goodness, check out the Flannel Friday website.
Thursday, July 19, 2012
Themeless Thursday: July Displays
We had a special guest for story time last week, so no Theme Thursday or craft to report this week. But I wanted to show off some of the current displays and since I've got my Tuesdays (where all the random stuff goes) scheduled for the next 3 months, this seemed like a great excuse.
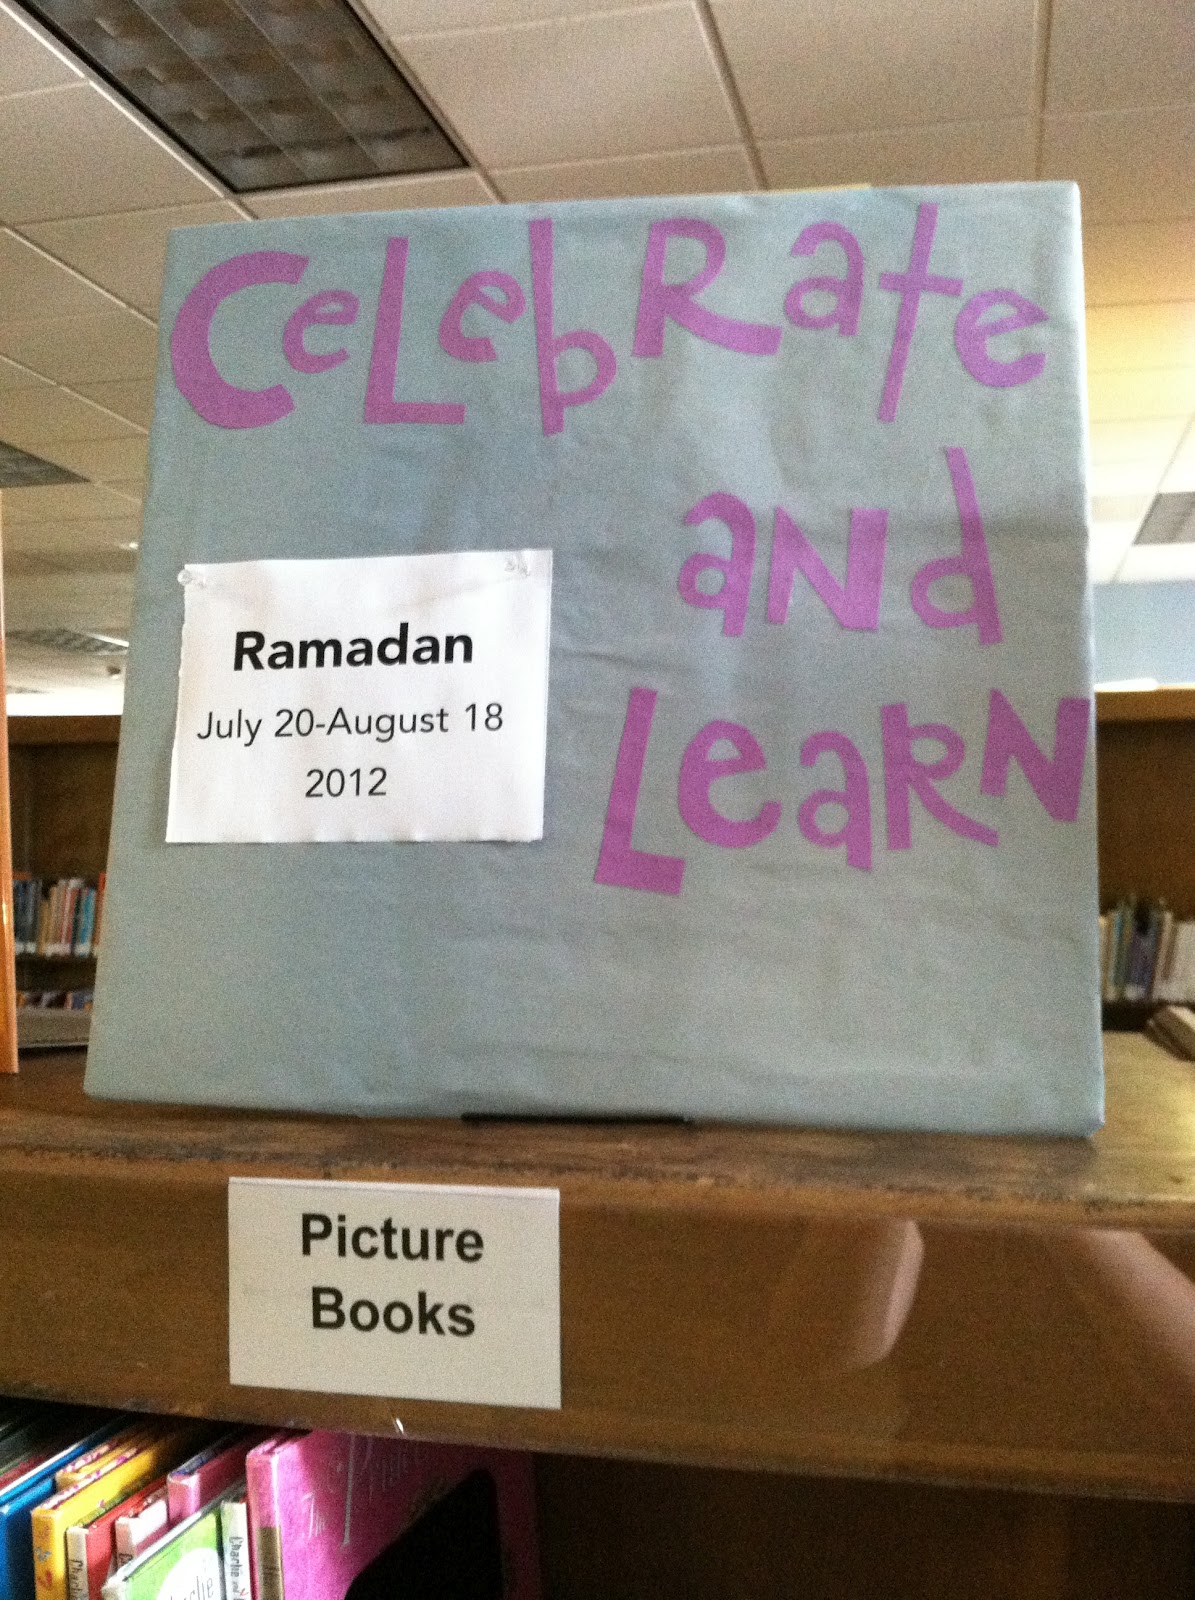
Ramadan snuck up on me y'all! It starts tomorrow and if I hadn't been in a training on Monday where someone mentioned it, it would have passed me by. We don't have a whole lot of books on Ramadan so I supplemented with books on Islam and this giant green crescent and star. And yes, I know that the crescent and star aren't actually symbols of Islam, but it's really hard to find visual representations for a religion that eschew symbols.


Ramadan snuck up on me y'all! It starts tomorrow and if I hadn't been in a training on Monday where someone mentioned it, it would have passed me by. We don't have a whole lot of books on Ramadan so I supplemented with books on Islam and this giant green crescent and star. And yes, I know that the crescent and star aren't actually symbols of Islam, but it's really hard to find visual representations for a religion that eschew symbols.

Due to my total lack of knowledge about Ramadan and its timing, I've resolved to become more aware of world holidays and better about informing our users about them. To that end, here's my new Celebrate and Learn board with a space to rotate the holidays as they happen. I like the concept, but not the outcome. The light blue butcher paper is seriously faded and it just doesn't pop. Maybe after Ramadan is over I'll revisit the execution.
My new favorite display is Good Movie? Great Book! I've been trying to figure out how to stage it for a while because we have so little actual display space. I eventually cleared off a shelf in the DVD section and set up shop there. Since the space is so small, the DVD and book pairings are constantly changing, so maybe this way it'll stay fresh longer. I think I've had to fill in four pairs since this picture was taken on Tuesday.

I was going for a movie theater look with the heavy red curtains and glittery marque letters. Do you guys know about Rachel Moani's blog? Because her displays are a constant source of amazement and inspiration and I stole the technique for the red curtains directly from her.

The air conditioning at work has been broken for the past two days. And it is miserable in the building. Particularly upstairs in the children's room. In fact, today the temperature reached over 90 degrees and we had to shut down the room. So I spent most of my day manning the adult reference desk after most of the staff left early due to heat exhaustion. I'm not even joking. As a result, my third big display for the month isn't quite done. Tomorrow. Maybe.
Until then, here are a few in process pictures, including the concept sketch. I love summer road trips, don't you?

I have little popsicle stick tags for (most of) the states and will be filling in the display with books that take place in different states. 50 books is probably ambitious, so I'll do about 15 at a time, filling in as they get checked out.

I'm also playing around with making this a drop-in program. Prizes for reading a certain amount of state books, state trivia questions, naming all 50 states (which is a lot harder than you would think. I couldn't and as a result am missing tags for South Carolina, Kansas and Rhode Island. I have two degrees and my grandmother lives in South Carolina. That's pretty bad, y'all.) But the programming aspect is still a ways off.

Here's the Piece de Resistance in progress, a gigantic cardboard cutout of the United States of America. Hey Eastern Seaboard, looking good.


I'll update with more pictures once the display becomes final.


Updated!
Tuesday, July 17, 2012
Make Your Own: Button Bracelets

I can't take credit for this program idea. Our awesome teen person planned this one and then accidentally scheduled it for her off day. So, obviously, I stepped in; I love craft programs. I couldn't get any actual teens to participate-- our group today consisted of a bunch of surly 16 year old boys who were unswayed by my "make something pretty for your girl or your mom" speech, but I managed to recruit a bunch of kids from upstairs and we had a great time making bracelets and talking about best friends and farts. Seriously, these kids love farts.
You probably know the drill, there are tutorials all over the internet for these bracelets, but they're fun and easy and the sheer variety of buttons that you can find means that you can make these for days and they're always new and exciting.

The actual how-to is pretty simple. Cut a length of elastic cord and tie a knot in one end. Then string the buttons. The key to making the buttons sit on top of each other like they do in the examples is in the way you thread the buttons.
Thread the first button by bringing the elastic from the bottom of the button up through the top and then back down again. The second button will be the exact opposite: bring the elastic through the hole from the top and then thread it back up again.


By alternating up-down-up-down with the buttons you'll achieve the much desired super concentrated look. Make sure you cinch the buttons close together and continue on until you've reached the desired length.


And voila! Lots and lots of beautiful fashion statements.
After making bracelets for a while we got creative and started making necklaces and headbands and every other type of button accessories imaginable. I think I even saw a very uncomfortable looking button ring at one point.

I think this program worked best with our group of 8 to 12 year olds, rather than the intended teens. When we do our other big fashion program later this summer, we'll definitely target the teens more. The button bracelets also attracted more boys than I expected: three boys joined us to make bracelets. One made a second for his mom- blue and silver to match her ring- but they all made their first bracelets for themselves. Just goes to show you that you should never make assumptions about your audiences. The mom loved her bracelet, by the way, she showed up at the end and fawned over both her son and the craft. It's so cool to see parents engaged in their kids' lives.
Subscribe to:
Posts (Atom)