We're supplementing the outside summer reader performers this year by having librarians present a program of their own design at several different branches during the summer. I already had this program planned for my branch and I enjoy seeing what other branches are doing, so I volunteered to be one of the traveling librarians this summer.
Using basic print making techniques and simple book binding, kids 7 and up will have a chance to create their very own notebook at four libraries around the city this summer. We're calling them Dream Journals since that fits the theme, but really these notebooks can be used for anything!
I adapted a tutorial on printmaking that I found on Pinterest for the print portion, and my friend Joseph taught me how to do several different types of book binding my last semester of college; I was looking for a new way to recycle all the thesis drafts that I had lying around my apartment. I'll probably write another post on these notebooks once I've presented at a few branches, but for now here's a quick how-to for making your own dream journals.
Supplies:
-flat styrofoam (the bottoms of plates or the tops of old take-out containers work well)
-pencil
-sponge
-paint (I use tempera)
-manilla folder
-hole punch
-yarn
- blank paper, folded in half
Sizing Your Notebook:
Take one piece of the paper that you'll be using as the inside and fold it in half. Trace the half sheet of paper on the manilla folder, on the fold. Cut out your traced rectangle making sure you don't cut the fold. Now you should have what appears to be a much smaller manilla folder, but is in actuality the cover for your new notebook.

Using Prints to Design the Cover:

Cut the Styrofoam into manageable sizes. My squares are about one square inch, but you can very easily go larger if you want more detail.

Using a pencil, press down and draw on the Styrofoam. If you're including words remember to write backwards since we're going to get a relief/mirror print. I made generic night time pictographs for my samples, but I'll take extra Styrofoam with me to the branches so the kids can add whatever they want.

Saturate the side of a sponge in paint. In a perfect world you would use printer's ink or acrylic paint, something that gets sticky and a roller. This is not a perfect world so I'm using tempera paint.

And dab the paint onto the print-block evenly

Place the print-block paint side down on the journal cover and press for a few seconds. Carefully peel it off the reveal the print underneath. Repeat as desired.

Putting the Notebook Together:
Take your stack of inside-the-notebook paper and fold it in half. Hole punch 5 evenly spaced holes down the side, on the fold. Using one sheet as a template, trace the 5 holes onto the cover of the notebook and punch those out as well. Now when you lay the cover and the paper flat on top of each other all 5 holes should line up perfectly.


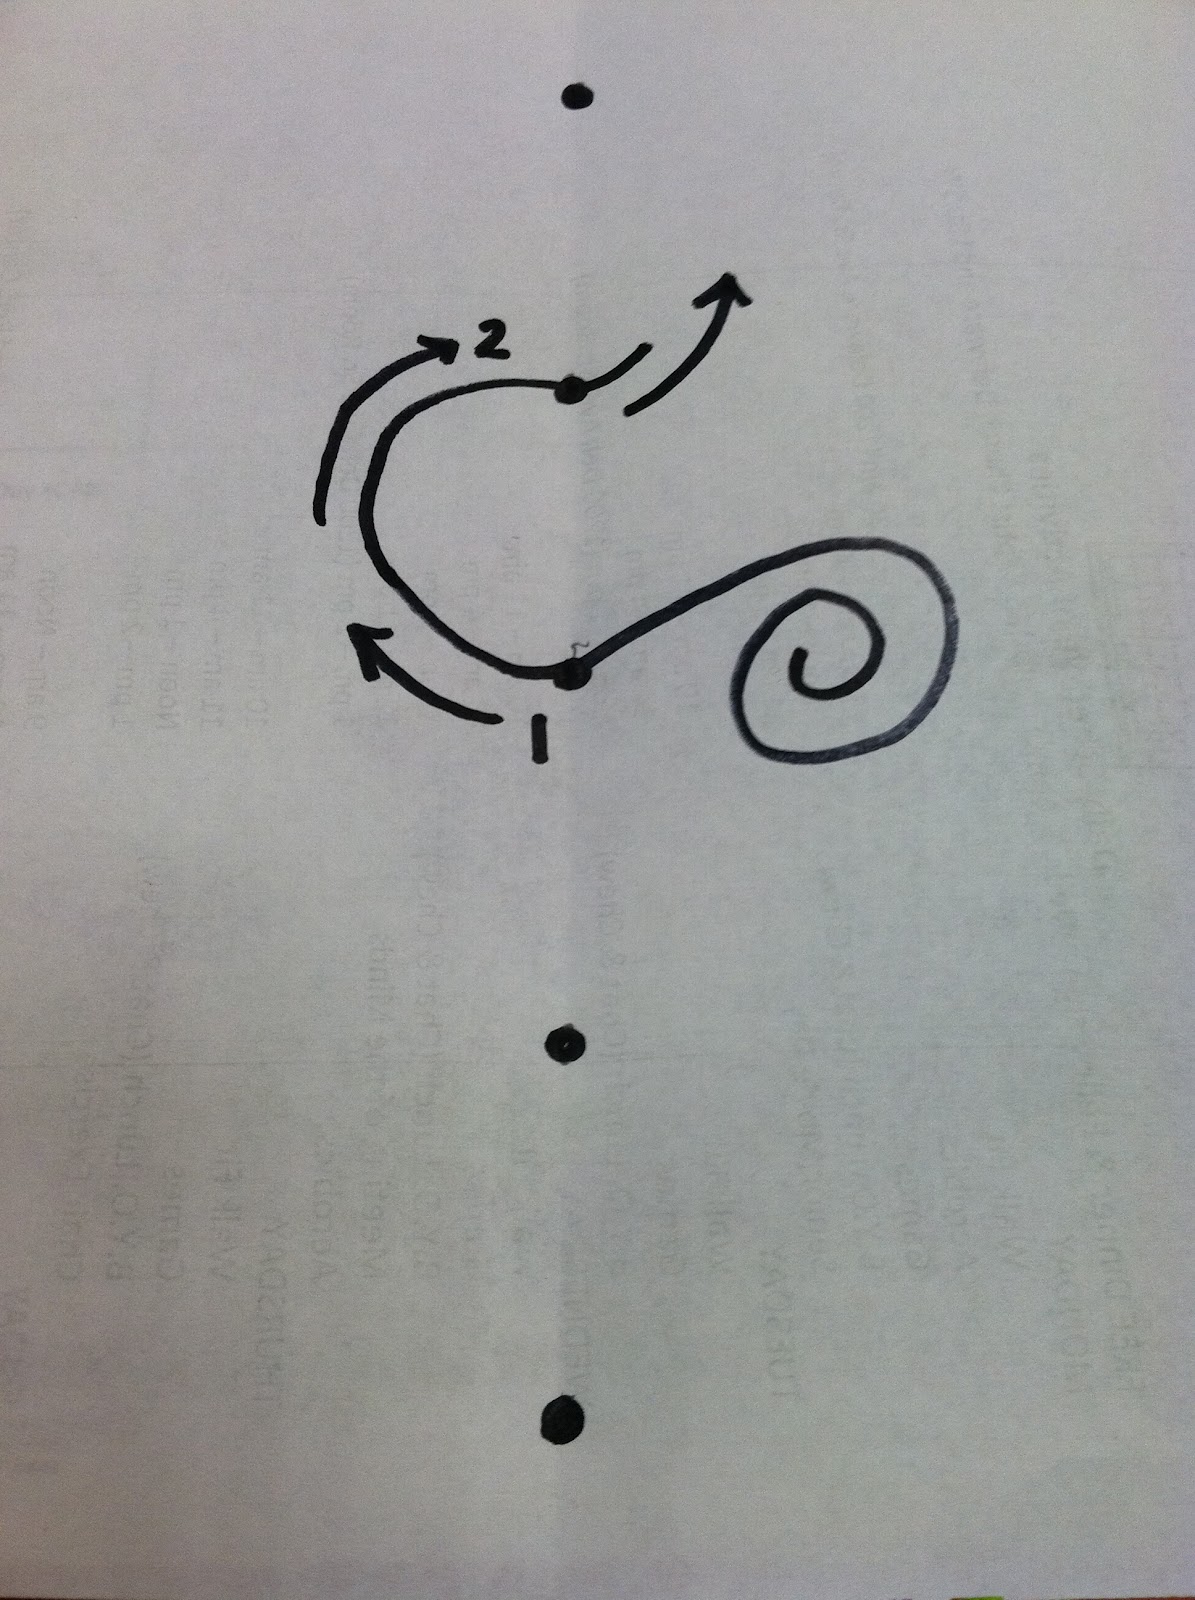
And here's where I get way less talky and let the pictures speak for themselves. On the left you'll see the yarn being threaded to make the sample notebook and on the right you'll see the diagram of where the yarn is going in the picture. Be sure to leave a tail in the middle of the notebook and to pull your yarn tight each time it threads through a new hole.


And you've done it! You've made your very own notebook! Congratulations. Now go forth and fill it with your thoughts, hopes and DREAMS.


Lucy, you are amazing and so talented :).
ReplyDelete